Sunday, August 13, 2017

Strawberry Bread

I don’t remember where my mother got this recipe or when she started making it. All I know is that at one point in my childhood, we made and ate a lot of strawberry bread. My guess is that it came out of the years of zucchini bread. I grew up in New England where the plight of the late summer zucchini infestation is very real. These innocent-looking squash would become mutant hordes within a blink of an eye. Every Yankee knew of 50 plus ways to use the baseball-bat sized squash, and zucchini bread was a
summertime staple. After moving to the Midwest, we no longer feared opening the front door to find a “veggie gift” left on the porch from the neighbors. However, we missed the tradition of the tasty snack bread. 

I have fond memories of this bread, so I’m excited to make it again and see if I can make it turn out as good as mom did.

The Recipe
3 cups flour
1 teaspoon baking soda
1 teaspoon salt
3 teaspoons cinnamon
2 cups sugar (1/4 cup or more, if desired)
3 eggs (well-beaten)
10 ounce package unsweetened frozen strawberries (thawed and crushed) *(20 ounces unsweetened if desired)
1 1/4 cup cooking oil
1 1/4 cups nuts (pecans or walnuts) optional
*1 teaspoon strawberry extract

Sift dry ingredients together into a large bowl. Make a well and add oil. Mix in other ingredients. Stir and dampen. 

Pour into two greased loaf pans. Bake at 350 degrees for about 45 mins or until done (pick clean). 


The Bake

I went for the full 20 ounces of strawberries, because, well, the more strawberry the better, right? I did not add nuts because I never remembered nuts in our batches.

The flavor in question
I wasn’t hip on the idea of using strawberry extract. I couldn’t remember if and when my mom started using it, although she must have if she added it to the recipe. I’ve never liked the taste of artificial strawberry (I was not a Frankenberry fan. I was a Count Cholula girl). For the sake of the recipe, I thought I would try it. I had a tough time finding it though. I went to three different grocery stores before I finally found a natural version at Whole Foods. It smelled much more “strawberry” than the old stuff, so I went ahead and tried it.


Why aren't you baking my pretties?

After 45 minutes, the loaves weren’t close to being done with the clean pic test. I believe this was due to the fact that I did indeed use the full 20 ounces of the strawberries, and, the frozen strawberries I purchased from Whole Foods were FAR superior from the ones we used to get at the Tradewell back in the day. These were plump and full of juice and quite flavorful for frozen (perhaps that is where the addition of the strawberry extract came into play. The frozen strawberries back then didn’t have much flavor). With the additional liquid and moisture, I added almost a 1/2 hour to the baking time. I just kept checking from time to time until I got the clean pick.
The Results


Oh my! One taste took me right back to my mom’s kitchen. Delicious! Just as tasty and addictive as I remembered. Although I could taste it was there, the strawberry extract didn’t overpower the bread, and this particular brand didn’t have that artificial candy-like aftertaste. I think if you have good quality strawberries, you can leave it out, but I liked the flavor.

Finally done! Smells SO good.

I don’t think it needs any additional sugar than the 2 cups. In fact, next time I might back off the sugar just a tad actually. I believe this is due to the higher quality of frozen strawberries used, which were sweeter on their own.

As I mentioned, we never tried it with fresh strawberries. It would probably be tasty, but a different flavor, as the crushed fruit wouldn’t blend through the bread. It would be like banana bread with slices of bananas instead of the ripe puree.

The waiting is the hardest part!
Old habits die hard. I used to be so anxious to get into that strawberry goodness, that I would try and take it out of the pan too soon. I did the same thing again. I didn’t wait long enough for the bread to cool in the pan before turning it out, so the bottom stuck a bit and the loaves started to fall apart. Give them at least 20 minutes to cool, if not more. Also, don’t cut right into it. When warm, it doesn’t slice, it crumbles. Let it cool COMPLETELY before cutting, like over an hour or two. I know, I know. Who can wait that long? You can also pop it in the freezer to speed up the cooling, and it will slice up much nicer. Or, if you don’t care what it looks like, just dive right in.


Overall, it’s a lovely quick bread and a nice alternative to banana bread rut. It makes a tasty treat for breakfast, after-school snack or potlucks.
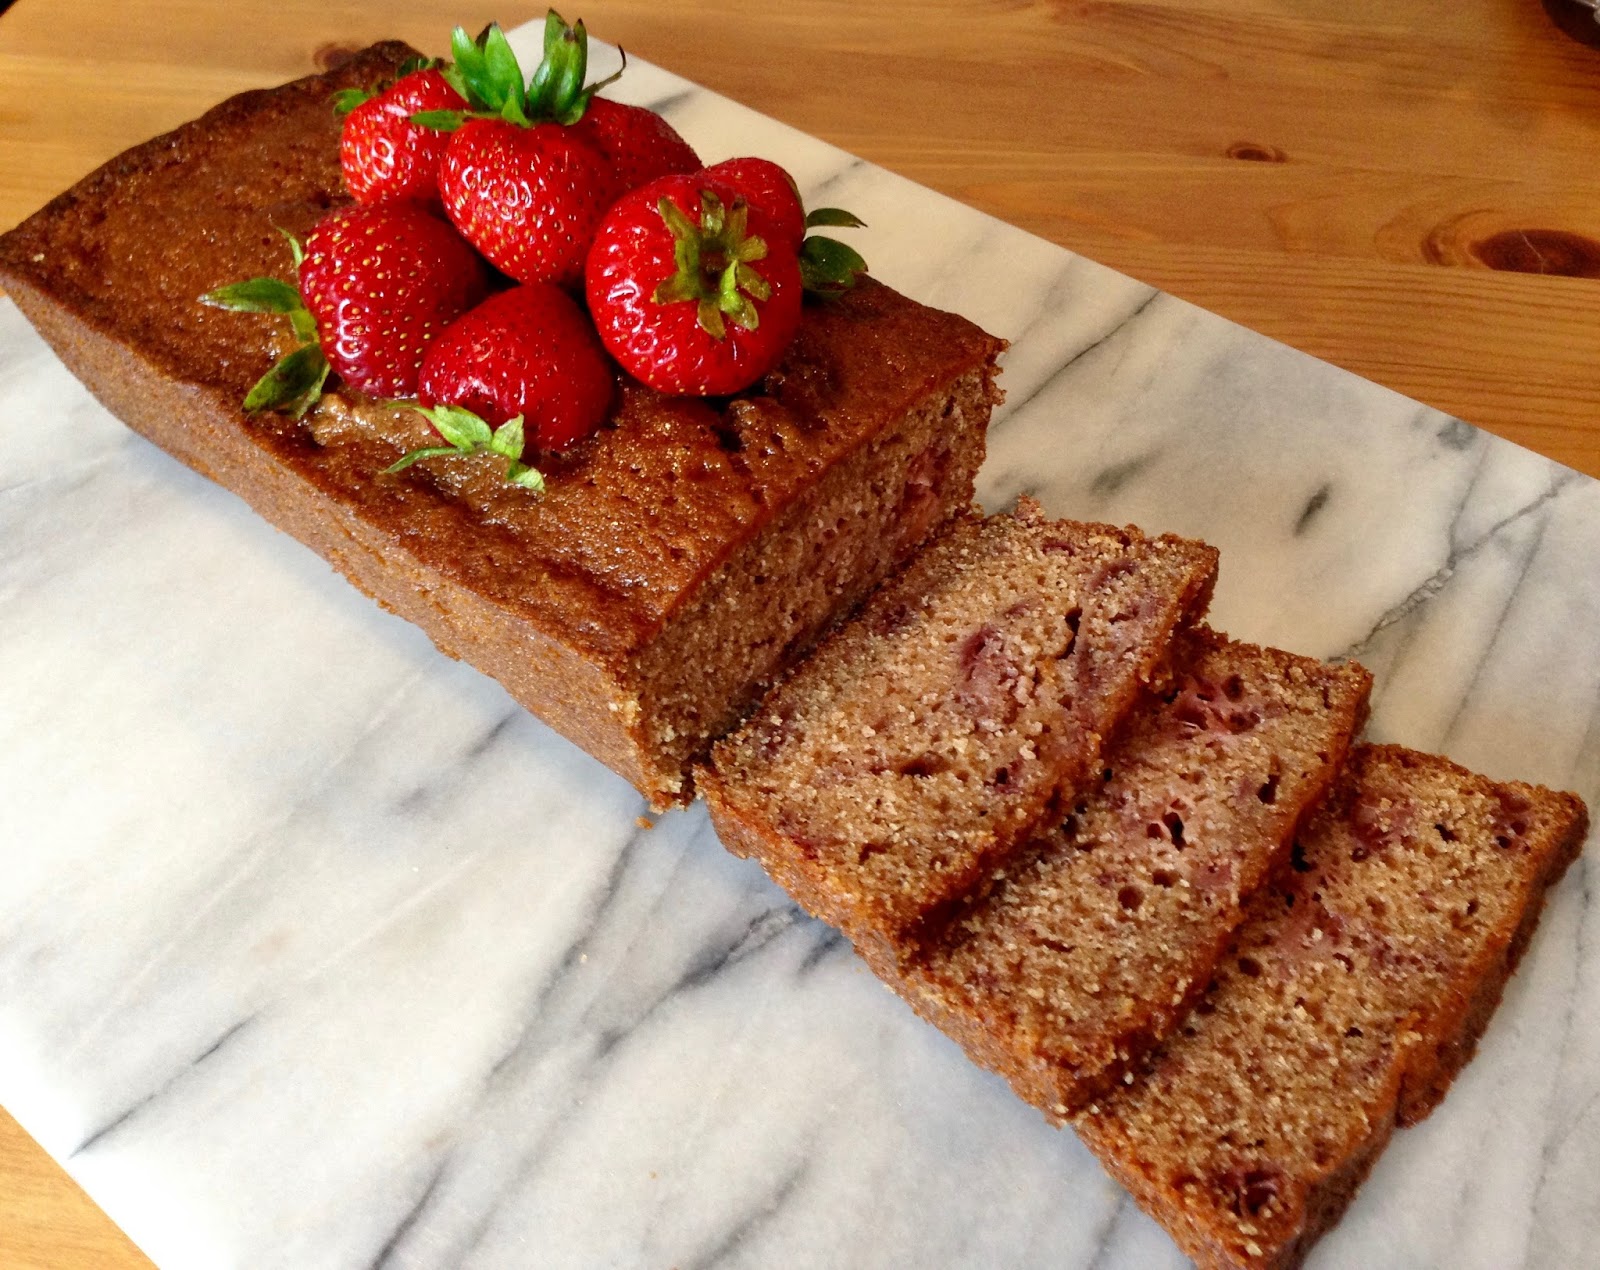


It’s tasty on its own, but you can also serve it with butter or cream cheese, or, if you want to go for the ultimate strawberry overload, slather it with some strawberry cream cheese (usually can find it next to the regular). Trust me. It’s SO addictive.
Strawberry bread with strawberry cream cheese. Drool-worthy. 

Wednesday, August 2, 2017

Hershey's "Perfectly Chocolate" Chocolate Cake


A "back-of-box" recipe, but a reliable classic.
My mom loved this cake. It was our go-to chocolate cake recipe for years. We first found the recipe on the back of the tin of Hershey’s Cocoa (back in the day when cocoa came in a tin), and we kept that old tin around for years to keep the recipe (we never had the presence of mind to actually copy it down). We kept the tin in the pantry, but somehow it would disappear and reappear, get misplaced and found again and every time we found it we would celebrate by baking the cake. Someone would accidentally toss it and we would go out to the store and look for a new one that had both the cake and frosting recipe on it. Once Hershey’s made the label removable, we kept a number of labels squirreled away in drawers and cookbooks so we wouldn’t lose it. It’s an addictive cake, especially the sweet frosting. I remember one Friday after school we made the frosting, but never got to making the cake and just ate the frosting by the spoonful. It was my first cake that I made by myself to take to a social function (Latin club) and it was a hit. Then again, any cake is a hit for Jr. High School kids. Somehow, we stopped making this cake over the years. Maybe our tastes changed, maybe we just had forgotten about it, but we always held fond memories of baking this together. I have a feeling she had a hand in me choosing this recipe first. I’m happy to make for her again. 

The Recipe


Hershey's "Perfectly Chocolate" Cake

2 cups sugar 

3/4 cup HERSHEY'S Cocoa 
1-3/4 cups of all-purpose flour
1-1/2 teaspoons baking powder 
1-1/2 teaspoons baking soda 
1 teaspoon salt
2 eggs
1 cup milk
1/2 cup vegetable oil
2 teaspoons vanilla extract
1 cup boiling water 


1. Heat oven to 350°F. Grease and flour two 9 inch round baking pans.

2. Stir together sugar, flour, cocoa, baking powder, baking soda and salt in large bowl. Add eggs, milk, oil and vanilla; beat on medium speed of mixer 2 minutes. Stir in boiling water (batter will be thin). Pour batter into prepared pans.

3. Bake 30 to 35 minutes or until wooden pick inserted in center comes out clean. Cool 10 minutes; remove from pans to wire racks. Cool completely. Frost with "PERFECTLY CHOCOLATE" CHOCOLATE FROSTING. Makes 11-12 servings.


"Perfectly Chocolate" Chocolate Frosting

1/2 cup (1 stick) butter or margarine
2/3 cup HERSHEY'S Cocoa
3 cups powdered sugar
1/3 cup milk
1 teaspoon vanilla extract

Melt butter. Stir in cocoa. Alternately add powdered sugar and milk, beating to spreading consistency.
Add small amount additional milk, if needed. Stir in vanilla. About 2 cups frosting.


Variations

CUPCAKES: Line muffin cups (2-1/2 inches in diameter) with paper bake cups. Heat oven to 350°F. Fill cups 2/3 full with batter. Bake 22 to 25 minutes. Cool completely. Frost. About 30 cupcakes.
ONE-PAN CAKE: Grease and flour 13x9x2-inch baking pan. Heat oven to 350° F. Pour batter into prepared pan. Bake 35 to 40 minutes. Cool completely. Frost.
THREE LAYER CAKE: Grease and flour three 8-inch round baking pans. Heat oven to 350°F. Pour batter into prepared pans. Bake 30 to 35 minutes. Cool 10 minutes; remove from pans to wire racks. Cool completely. Frost.
BUNDT CAKE: Grease and flour 12-cup fluted tube pan. Heat oven to 350°F. Pour batter into prepared pan. Bake 50 to 55 minutes. Cool 15 minutes; remove from pan to wire rack. Cool completely. Frost.

The Bake
Super thin batter. Don't panic! 

Overall, this is an easy cake to bake, almost as easy as a boxed cake mix. The directions and ingredients are straightforward and no special techniques are required. There are a couple of keys to ensuring the batter comes out perfectly. Make sure you blend the wet and dry ingredients well when combining, making sure the cocoa isn’t clumpy and the eggs and milk are thoroughly combined. Give it at least two minutes on medium speed. If hand blending, put your weight behind it and stir well. The other key is to make sure when you fold in the boiling water (and yes, it does make a difference, avoid cold water), the batter will be thin. It's okay. Don’t panic and add more flour. If you do, the cake will be dry.


Being that this was the first time I had baked in awhile, and the first cake in this kitchen, I ran into a few baking issues with this cake. 

All three layers of the cake baked a little uneven, sloping down to the left, and the one that was on the left of the oven was the most lopsided. Since they all leaned down to the left, I’m suspecting this is a problem with my oven. It’s either slightly uneven heat, slightly uneven racks, or, slightly uneven kitchen. Since I live in LA in an older apartment building, the latter is most likely the case (we rock here in LA). Being that it is a wall oven and I’m a renter, I may have to get creative in finding ways to fix or compensate. (I have found other issues with my wall oven I will address in later posts).


Mom and I usually made this as a sheet cake or cupcakes. After I had decided to make it a layer cake, I didn’t realize I only had two 8-inch round cake pans instead of two 9-inch. Most conversion charts say you can just use the 8-inch, but I have seen some pretty nasty volcanic creations on some cakes that rose high. I couldn’t remember how high this cake rose and I didn’t want to risk having them overflow, so I baked two and then one after. Turns out, I probably had room to bake it as a 2-layer in 8-inch pans. My third layer was a little short. A great source for calculating cake pan switcheroos: http://dish.allrecipes.com/cake-pan-size-conversions


It has been a long time since I’ve frosted a cake, and I can’t remember the last time I made a layer cake (we never had the patience to wait that long to eat cake). Since it's a classic American buttercream frosting, if you overwork it after it starts to set, it will become a little grainy. I kept fussing with it to try and make it perfect, and it lost the silky shimmer. Note to self: don’t fuss with it so much.

The Results

This cake tastes EXACTLY as I remember. Moist, rich, sweet and oh so good. It’s a little like a fluffy brownie. The frosting adds an extra layer of chocolate sweetness. I usually prefer a less sugary cake (some store-bought cakes are way too sweet for me), but there is something about this one that I don’t mind the sweetness, and subsequent sugar rush after. Seriously. Be forewarned. One slice is close to the sugar equivalent to a Grande Caramel Frappuccino from Starbucks (I calculated it), but nearly half the sugar comes from the frosting, so if you want to avoid that face-plant sugar crash in the middle of binge-watching FARGO, you can keep the frosting light, or skip it all together. However, if you need that extra boost to finish that dream project of organizing your closet by color, season, and moon phase, pile it on. 

It's a great cake for newbie bakers or anyone who wants to avoid buying the boxed cake. Try it and see why it's stood the test of time. 


Not the best frosting job, but at least fully covered. 

I spoiled my dinner on this one!


I also discovered that my kitchen with it's 60's recessed lighting is very shadowy, and downright moody in some spots. Great for cocktail parties, but makes taking pretty pictures difficult. I'll have to find some creative ways to take better pictures on my limited camera equipment budget.